IDEA作为我们(后端Java开发者)必不可少的IDE,以其智能的代码提示、多样的框架支持、简洁的开发界面等特性,被业界公认为最好的Java开发工具之一。而一款IDE是否强大,最简单的衡量标准就是查看其插件生态环境的发展情况,多种多样的插件既丰富了IDE自身的功能,同时大大提高了开发人员的工作效率。
自定义语言支持,例如Go语言插件。这种插件包括文件类型识别、格式化、语言保留字支持、编译、运行等语言开发必备功能。属于比较重量级的插件。
开发框架支持,例如Spring框架插件。这种插件包括框架特殊代码识别、框架功能支持等。不同开发框架开发量、难度不同。
工具集成,例如我司内容的云雀,就是这种插件,也是最常用的插件,后续的开发实例也属于这种类型。这种插件一般包括额外的功能、功能相关的UI以及访问外部资源。
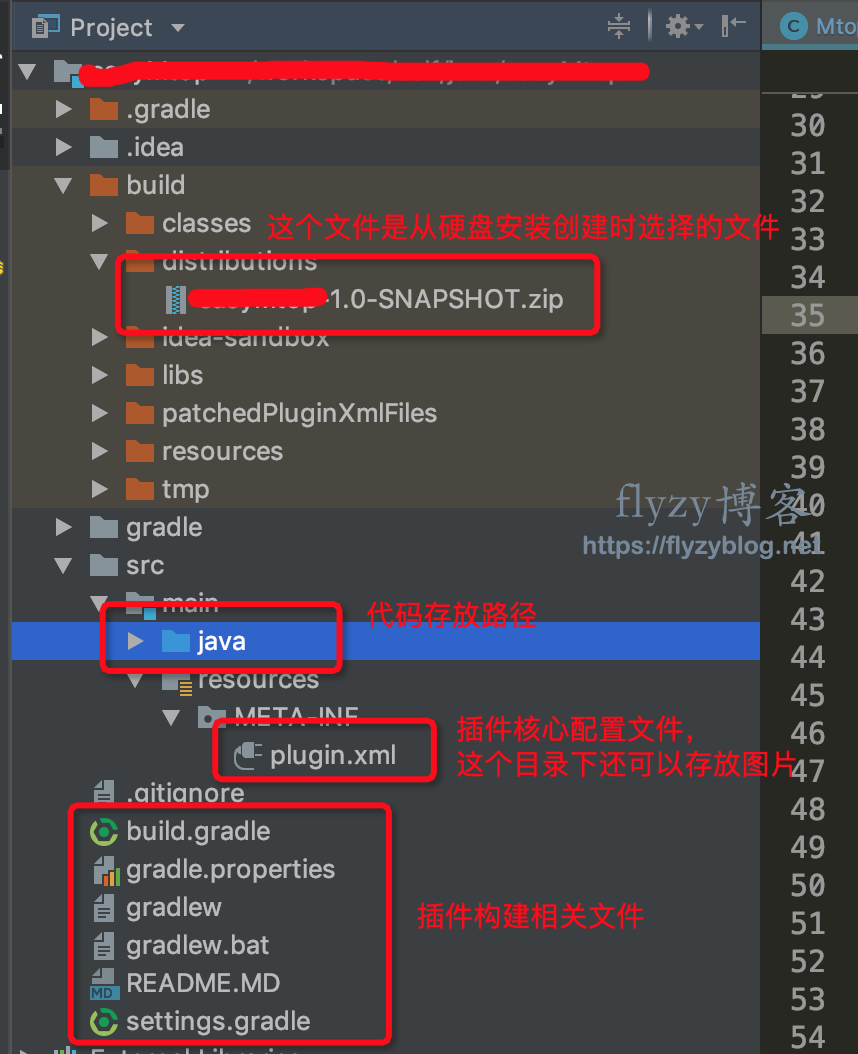
配置文件,配置文件就是插件对IDE的自我介绍,IDEA中是META-INF/plugin.xml,详细的配置信息请参见官方文档。
ClassLoader,每个插件对应一个ClassLoader,彼此之间隔离(类似于Pandora的插件机制)。
Component(组件),插件内部可以有三个级别的组件:Applciation、Project、Module,分别需要在plugin.xml文件配置,并实现不同的接口。
扩展和扩展点(Extesions and Extension Points),扩展用于扩展IDEA自身或者其他组件扩展点的功能,例如添加一个自定义的JavaDoc中的Tag。扩展点是插件提供给其他插件使用的。
动作(Action),动作在配置文件中配置,由某个菜单项触发。
服务(Service),用于后端运行的某些服务实现。
依赖(Dependencies),插件可能依赖的其他插件、三方包等。
IDEA插件项目开发时,有两种创建方式,一种是IntelliJ Platform Plugin,另一种是Gradle下的IntelliJ Platform Plugin(在Gradle插件安装的情况下)。推荐使用第二种方式,使用Gradle的方式可以方便的添加第三方依赖库,同时也是官方推荐的方式。 由于实例插件是一个工具集成类型的插件,我们需要在IDEA的UI添加插件的入口,这部分在配置文件plugin.xml中添加如下内容:
actions > group id ="分组id" text ="显示文本1" description ="鼠标驻留时的显示" > add-to-group group-id ="MainMenu(这个id指的是IDEA的顶部菜单)" anchor ="位置(last等)" /> action class ="动作类全路径" id ="动作类id" text ="显示文本2" description ="鼠标驻留时的显示" /> group > actions >
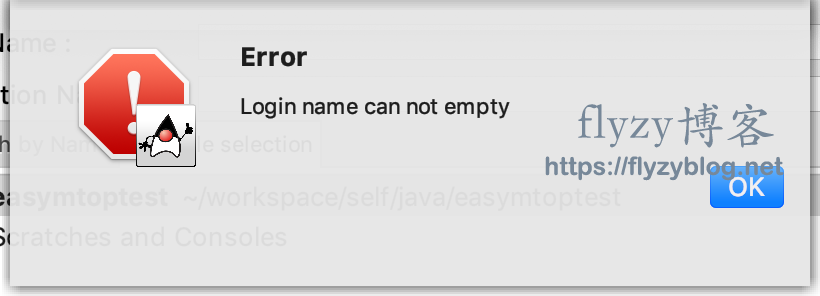
我们可以发现,入口就是一个Action。需要申明Action的位置和处理类。以上声明的UI效果: 在配置文件中指明的动作处理类中添加处理逻辑。具体逻辑根据实际需要。 Messages.showErrorDialog(myTabbedPane.getComponent(),” 弹出文本内容”); 使用 new Notification(groupId 自定义, 标题, 内容, 类型(info、warning、error)).notify(项目对象实例);
extensions defaultExtensionNs ="com.intellij" > customJavadocTagProvider implementation ="扩展点实现类" /> extensions >
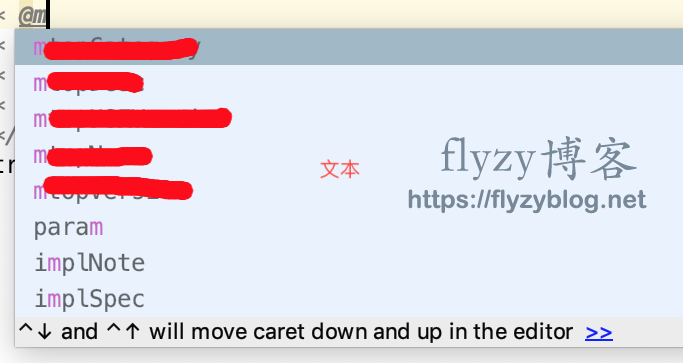
(1)在plugin.xml中配置liveTemplate扩展点的相关实现:
defaultLiveTemplatesProvider implementation ="DefaultLiveTemplatesProvider接口的实现类" /> liveTemplateContext implementation ="TemplateContextType类的子类" />
(2)在 DefaultLiveTemplatesProvider 接口的实现类的 getDefaultLiveTemplateFiles 方法中注册LiveTemplate定义文件:
@Override public String [] getDefaultLiveTemplateFiles() { return new String []{"liveTemplates/文件1" , "liveTemplates/文件2" }; }
(3)在 TemplateContextType 类的子类的构造方法中定义上下文名称,以及 isInContext 方法中定义上下文可以使用的位置。例如:
public XXXJavaInlineCommentContextType () super ("上下文id" , "名称" , 上下文基础类型); }
@Override public boolean isInContext (@NotNull final PsiFile file, final int offset) if (PsiUtilCore.getLanguageAtOffset(file, offset).isKindOf(JavaLanguage.INSTANCE)) { PsiElement element = file.findElementAt(offset); if (element instanceof PsiWhiteSpace && offset > 0 ) { element = file.findElementAt(offset-1 ); } if (null == element) { return false ; } return (element.getParent() instanceof PsiInlineDocTag && element.getParent().getParent() instanceof PsiDocTag) || (element.getParent() instanceof PsiInlineDocTag && PsiTreeUtil.getParentOfType(element, PsiField.class, false ) != null ); } return false ; }
(4)编写LiveTemplate定义xml文件,例如:
templateSet group ="分组名" >template name ="模板名" value ="模板值,可以使用$VAR1$来指代变量位置" description ="描述信息" toReformat ="false" toShortenFQNames ="true" > variable name ="变量名" expression ="" defaultValue ="" alwaysStopAt ="true" /> context > option name ="自定义的或者预定义的template上下文id" value ="true" /> context > template >templateSet >
(1)在Gradle的构建文件build.gradle中的dependencies内添加如下配置:
compile 'org.apache.dubbo:dubbo:2.7.7' compile 'org.apache.dubbo:dubbo-dependencies-zookeeper:2.7.7'
ClassLoader backCl = Thread.currentThread().getContextClassLoader(); Thread.currentThread().setContextClassLoader(this .getClass().getClassLoader()); ApplicationConfig application = new ApplicationConfig(); application.setName("应用名" );
RegistryConfig registry = new RegistryConfig(); registry.setAddress("zookeeper://127.0.0.1:2181" );
ReferenceConfig reference = new ReferenceConfig(); reference.setApplication(application); reference.setRegistry(registry); reference.setInterface("服务全类名" ); reference.setVersion("服务版本号" ); reference.setGeneric(true );
GenericService genericService = reference.get(); Object result = genericService.$invoke("方法名" , new String []{"参数类型" }, new Object []{"参数值" });System.out.println(result); Thread.currentThread().setContextClassLoader(backCl);
(1)在build.gradle文件中进行如下配置
publishPlugin { host = 'https://xxxx.com' username 'onepublish' password 'onepublish' token 'onepublish' }
(2)执行gradle中publishPlugin任务。 当我们开发完成后,通过publishPlugin任务发布时,可能会出现以下报错信息:
The resource identified by this request is only capable of generating responses with characteristics not acceptable according to the request "accept" headers.
这个问题的原因是我们使用的org.jetbrains.intellij版本较高,请使用2.x的版本。或者参照插件的源码自己写一个没有accept的上传方法即可。
package idea;
import retrofit.RestAdapter;import retrofit.client.Request;import retrofit.client.Response;import retrofit.client.UrlConnectionClient;import retrofit.converter.SimpleXMLConverter;import retrofit.mime.TypedFile;import retrofit.mime.TypedString;
import java.io.File;import java.io.IOException;import java.net.HttpURLConnection;
public class PublishPluginTest public static void main (String[] args) PluginRepositoryService service = new RestAdapter.Builder().setEndpoint("https://插件仓库链接" ).setClient(new UrlConnectionClient() { @Override protected HttpURLConnection openConnection (Request request) throws IOException HttpURLConnection connection = super .openConnection(request); connection.setReadTimeout(10 * 60 * 1000 ); return connection; } }).setLogLevel(RestAdapter.LogLevel.BASIC) .setConverter(new SimpleXMLConverter()) .build() .create(PluginRepositoryService.class); Response response = service.uploadByXmlId(new TypedString("" ), new TypedString("" ), new TypedString(pluginId), new TypedString("default" ), new TypedFile("application/octet-stream" , new File(plugin压缩文件路径))); System.out.println(response.getBody()); } }
package idea;
import retrofit.client.Response;import retrofit.http.*;import retrofit.mime.TypedFile;import retrofit.mime.TypedString;
public interface PluginRepositoryService @Multipart @POST("/plugin/uploadPlugin" ) public Response uploadByXmlId(@Part("userName" ) TypedString username, @Part("password" ) TypedString password, @Part("pluginId" ) TypedString pluginId, @Part("channel" ) TypedString channel, @Part("file" ) TypedFile file); }
在build.gradle的dependencies里边添加如下内容:
compile fileTree(dir:'src/main/resources/lib' ,includes:['*jar' ])


